Question 6
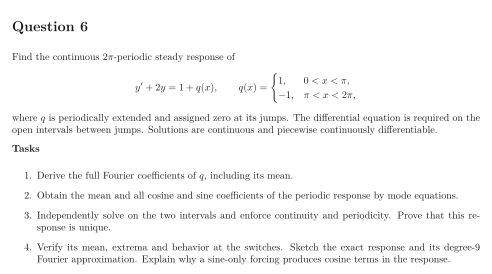
Find the continuous -periodic steady response of where is periodically extended and assigned zero at its jumps. The differential equation is required on the open intervals between jumps. Solutions are continuous and piecewise continuously differentiable.
Tasks
Derive the full Fourier coefficients of , including its mean.
Obtain the mean and all cosine and sine coefficients of the periodic response by mode equations.
Independently solve on the two intervals and enforce continuity and periodicity. Prove that this response is unique.
Verify its mean, extrema and behavior at the switches. Sketch the exact response and its degree-9 Fourier approximation. Explain why a sine-only forcing produces cosine terms in the response.
Show solutionHide solution
Question 6 – Solution
Strategy. Solve the harmonic response and the piecewise differential equation independently.
Step 1: Expand the input. The periodic extension of is odd. Direct integration gives zero mean and zero cosine coefficients, with The constant in is one.
Step 2: Solve the coupled mode equations. Write . Integration by parts is legitimate piecewise: continuity and periodicity cancel the internal and endpoint terms. Thus , , and . Hence and both coefficients vanish for even .
Step 3: Verify a closed-form periodic response. Put . Solving the constant-forcing equations and matching gives Both expressions give , and . A difference of two responses is across the whole period by continuity; periodicity forces . The verified closed form therefore has the coefficients determined above.
Step 4: Interpret the response. The first branch increases and the second decreases, so the extrema are and . Integrating the equation over a period gives mean . The response is continuous, but jumps by at and by at modulo ; the assigned input values do not require a derivative there. Differentiation couples sine and cosine coefficients, creating a phase shift. Absolute coefficient summability and the Fourier theorem identify the plotted series with the continuous response.
See the diagram in the original worksheet below.
